

Do you want to make cool wooden signs, decorations, or furniture? A CNC router can help you do that! It’s a smart machine that cuts shapes into wood. But first, you need to learn how to use it. Don’t worry—we’ll guide you every step of the way.
In this guide, you’ll learn how to program a CNC router and how to use it for wood projects. We’ll show you the tools you need, how to set things up, and how to avoid mistakes. By the end, you’ll be ready to start your first project with confidence.
Let’s get started!
What Is a CNC Router?
A CNC router is a machine that cuts wood, plastic, or metal. CNC means “Computer Numerical Control.” That’s a fancy way to say that the machine follows instructions from a computer.
Instead of cutting by hand, you tell the machine what to do using a program. The machine moves on three main lines: left and right (X), forward and backward (Y), and up and down (Z).
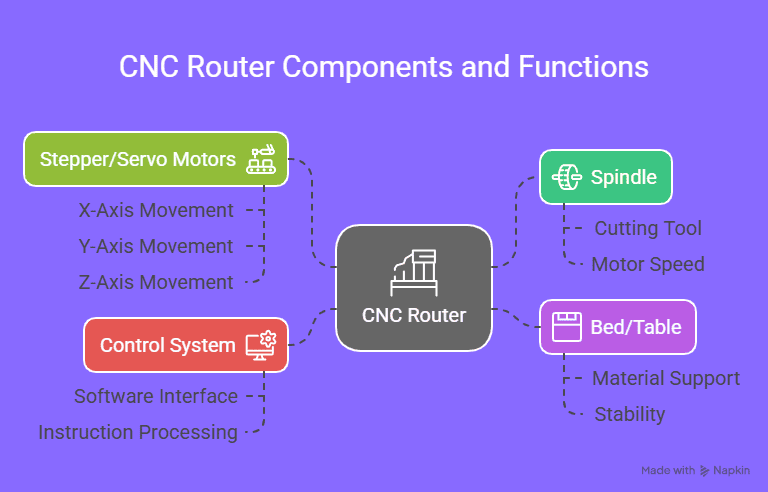
Key Components
- Spindle: The motor that spins the cutting tool.
- Bed/Table: The surface where you place the material to be cut.
- Control System: The computer and software that send instructions to the machine.
- Stepper or Servo Motors: These move the cutting tool along the X, Y, and Z axes.
CNC Router vs. CNC Mill
A CNC router cuts softer materials like wood and plastic. It moves the cutting tool over the material, which stays still. In contrast, a CNC mill handles harder materials like metal. It often moves the material against a stationary cutting tool.
This distinction ensures each machine is suited to its specific tasks and materials.
Tools & Software You’ll Need
To program and operate a CNC router, you’ll need the following tools and software:
1. CAD/CAM Software
Computer-Aided Design (CAD) and Computer-Aided Manufacturing (CAM) software are essential for creating designs and generating toolpaths. Some options include:
- Easel: A free, browser-based CAD/CAM program that combines design and toolpath generation, suitable for GRBL-based CNC machines.
- Carbide Create: An intuitive CAD/CAM software that allows users to design and create toolpaths, ideal for beginners working with Carbide 3D machines.
- Fusion 360: A comprehensive CAD/CAM software offering advanced features for 2D and 3D design and manufacturing. It has a free version for hobbyists and startups.
2. G-Code Sender Software
After generating G-code from your CAM software, you’ll need a G-code sender to communicate with your CNC router:
- Universal Gcode Sender (UGS): A Java-based, cross-platform G-code sender compatible with GRBL-based CNC machines.
- Candle: A user-friendly G-code sender with real-time visualization, suitable for beginners.
3. Safety Gear & Materials
Ensure you have the appropriate safety equipment and materials:
- Safety Gear: Safety glasses, hearing protection, and dust masks are essential when operating CNC routers.
- Materials: Start with softwoods like pine or MDF for practice, as they are easier to machine and more forgiving for beginners.

Where to Get Reliable CNC Router Parts
For a consistent performance and safety, your CNC router setup is only as good as the parts you use. Xuzhou Hanke Construction Machinery Manufacturing Co., Ltd. is a trusted manufacturer of precision CNC parts.
Based in Jiangsu Province, China, Hanke operates a 30,000-square-meter facility equipped with advanced CNC lathes, machining centres, gantry drills, and laser cutting systems.
They specialise in producing:
- CNC router components like shafts, sleeves, and cutting accessories
- Parts for pump trucks, crawler cranes, and mining excavators
- Durable tools used in woodworking, metalworking, and heavy machinery
Basic Concepts of CNC Router Programming
Understanding the fundamentals of CNC router programming is essential for beginners. Let’s explore the key concepts:
G-Code Basics
G-code is the language that tells your CNC router how to move. Each command starts with a letter and is followed by numbers. For example:
- G00: Rapid movement to a position.
- G01: Linear movement at a set speed.
- G02/G03: Clockwise/Counter-clockwise arcs.
A simple G-code line might look like this:
G01 X10 Y5 Z-1 F100
This tells the machine to move in a straight line to the point (10, 5, -1) at a feed rate of 100 units per minute.
Coordinate Systems (X, Y, Z Axes)
CNC routers operate in a 3D space defined by three axes:
- X-axis: Left to right.
- Y-axis: Front to back.
- Z-axis: Up and down.
Feed Rate, Spindle Speed, and Depth of Cut
- Feed Rate: The speed at which the cutting tool moves through the material. It’s measured in units per minute.
- Spindle Speed: How fast the cutting tool spins, measured in revolutions per minute (RPM).
- Depth of Cut: How deep the tool cuts into the material in a single pass.
Choosing the right values for these parameters depends on the material you’re cutting and the type of tool you’re using.
Step-by-Step: How to Program a CNC Router
Programming a CNC router involves a series of steps that transform your design into a physical object. Here’s a simplified guide tailored for beginners:
Step 1: Design the Part in CAD Software
Begin by creating a digital sketch of your project using Computer-Aided Design (CAD) software. Programs like Easel, Fusion 360, or Carbide Create are user-friendly options for beginners. These tools allow you to draw your design, whether it’s a simple shape or a detailed pattern.
Step 2: Convert to Toolpaths in CAM Software
Once your design is ready, use Computer-Aided Manufacturing (CAM) software to generate toolpaths. Toolpaths are the routes that the cutting tool will follow to shape your material. Some software, like Easel, combines both CAD and CAM functionalities, simplifying the process.
Step 3: Post-Process and Generate G-Code
After creating the toolpaths, the next step is to convert them into G-code—a language that CNC machines understand. This process is known as post-processing. The CAM software will generate a G-code file containing instructions for the machine’s movements, speeds, and tool operations.
Step 4: Load G-Code into the CNC Router
Transfer the G-code file to your CNC router using a G-code sender program like Universal Gcode Sender (UGS) or Candle. These programs communicate with your CNC machine, sending the instructions necessary to execute the job.
Step 5: Simulate and Run a Test
Before cutting your actual material, it’s wise to run a simulation or a test cut. This step helps identify any potential issues in the program and ensures that the machine operates as expected. Simulations can often be done within your CAM software or G-code sender.

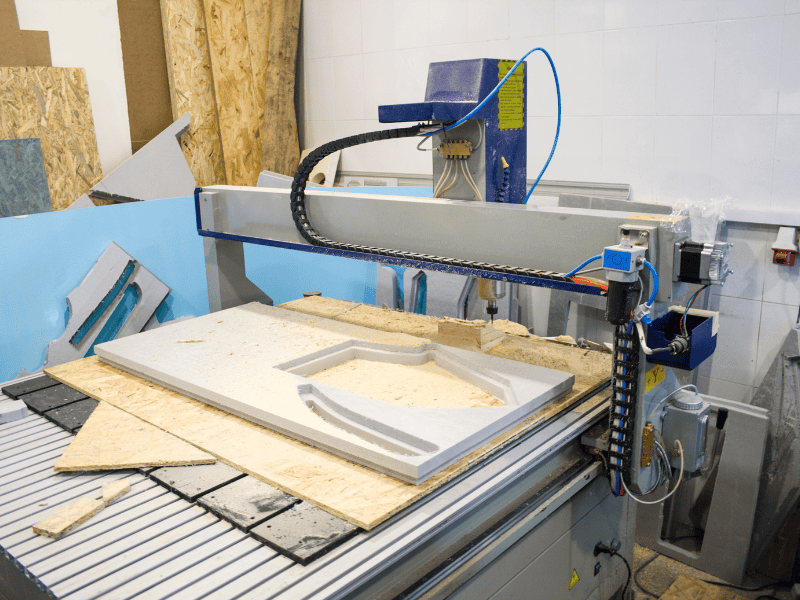
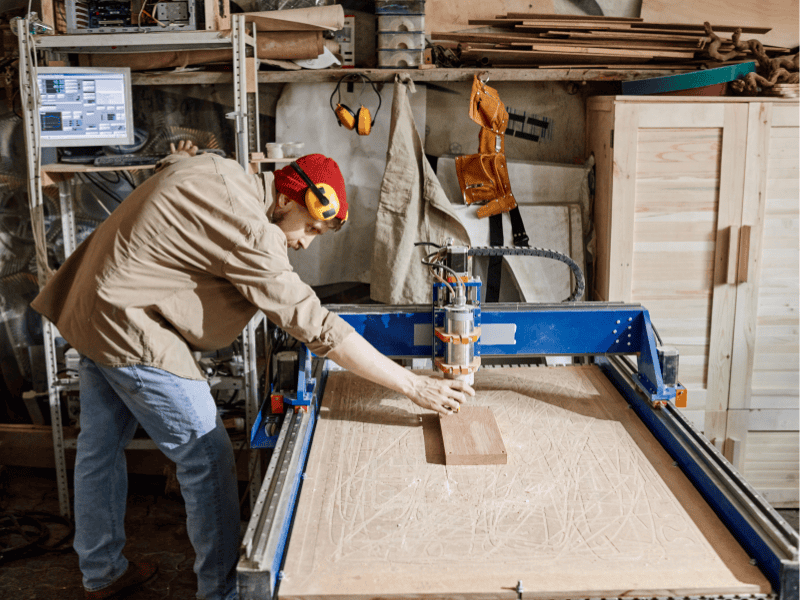
How to Use a CNC Router for Wood
Operating a CNC router for woodworking involves several key steps to ensure precision and safety.
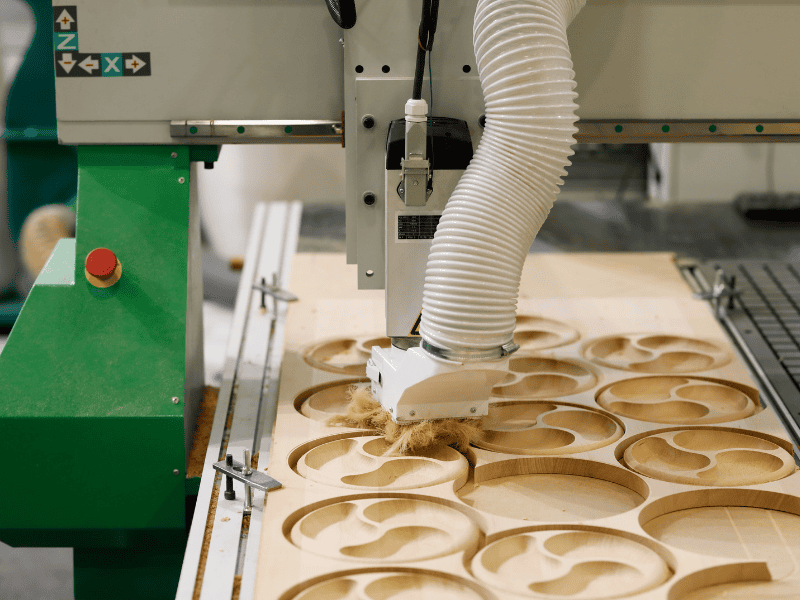
1. Prepare the Wood Material
Begin by selecting and preparing your wood. Ensure the surface is clean and flat. Secure the wood firmly to the router’s bed using clamps or a vacuum table to prevent movement during operation.
2. Choose the Right Cutting Tool
Select a suitable router bit based on your project requirements. Common options include:
- End Mills: Ideal for cutting and shaping.
- V-Bits: Perfect for engraving and detailed work.
- Compression Bits: Useful for reducing tear-out on both sides of the material.
Ensure the bit is sharp and appropriate for the type of wood you’re using.
3. Set Appropriate Cutting Parameters
Adjust the following settings in your CNC software:
- Spindle Speed: The rotation speed of the cutting tool.
- Feed Rate: The speed at which the tool moves through the material.
- Depth of Cut: How deep the tool cuts into the material per pass.
For beginners, it’s advisable to start with conservative settings and adjust as needed based on the results.
4. Run a Test Cut
Before proceeding with the final cut, perform a test run on a scrap piece of wood. This helps verify that your settings produce the desired outcome and allows for adjustments if necessary.
5. Execute the Final Cut
Once satisfied with the test cut, proceed with the actual operation. Monitor the process closely to ensure everything runs smoothly. After completion, inspect the workpiece for accuracy and finish.
Common Mistakes to Avoid
When starting with CNC routers, beginners often encounter some common pitfalls. Being aware of these can help you achieve better results and prolong the life of your equipment.
1. Skipping Test Runs
Jumping straight into cutting without a test run can lead to errors. Always perform a dry run to ensure your program operates as expected.
2. Incorrect Tool Selection
Using the wrong bit for your material can cause poor cuts or even damage your workpiece. Ensure you select the appropriate bit for the task at hand.
3. Improper Workpiece Clamping
Failing to secure your material properly can result in movement during cutting, leading to inaccuracies. Always double-check that your workpiece is firmly clamped.
4. Neglecting Maintenance
Regular maintenance of your CNC router is crucial. Dust and debris can accumulate, affecting performance. Keep your machine clean and inspect it routinely.
5. Ignoring Software Settings
Overlooking software parameters like feed rate and spindle speed can lead to suboptimal results. Familiarize yourself with these settings to optimize your cuts.
Tips for Beginners
Starting with a CNC router can be exciting yet challenging. Here are some beginner-friendly tips to help you navigate your CNC woodworking journey:
1. Start with Softwood
Begin your projects using softwoods like pine or cedar. These materials are more forgiving and easier to cut, allowing you to practice without the risk of damaging expensive hardwoods.
2. Use Simulation Software
Before executing a cut, utilize simulation features in your CAM software. This allows you to visualize the toolpaths and identify potential issues, reducing the risk of errors during actual cutting.
3. Join CNC Communities and Forums
Engage with online CNC communities and forums. These platforms offer a wealth of knowledge, troubleshooting advice, and project inspiration from experienced users.
4. Maintain Your Equipment
Regular maintenance of your CNC router ensures optimal performance. Keep the machine clean, check for loose components, and ensure all moving parts are well-lubricated.
5. Document Your Settings
Keep a log of your project settings, including feed rates, spindle speeds, and tool choices. This record will be invaluable for future projects and troubleshooting.
Conclusion + Next Steps
Now you know how to program a CNC router and how to use it for wood projects. You’ve learned about G-code, toolpaths, and safety tips. You even know how to avoid common mistakes.
Start with a simple project, like carving your name into wood. It’s fun and will give you confidence. Once you get better, you can move on to big and fancy designs.
Looking for dependable CNC parts or accessories?
Hanke Construction Machinery Manufacturing Co., Ltd. is a trusted name in CNC machining components. They offer precision-engineered parts like shafts, sleeves, pump truck accessories, and mining excavator tools.
Explore their products today and take the next step in your CNC journey with confidence.

